

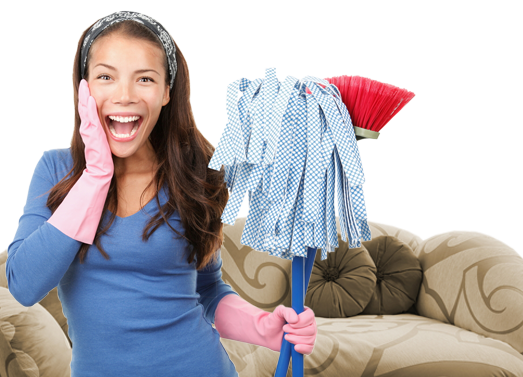
The Art of End of Tenancy Cleaning: Skills Every Tenant Needs
Posted on 29/09/2025
The Art of End of Tenancy Cleaning: Skills Every Tenant Needs
Moving out of a rented property is always a challenging and time-consuming process. Ensuring your home meets the landlord's high standards for cleanliness can be the difference between getting your deposit back or losing a significant sum. Mastering the art of end of tenancy cleaning is essential for every tenant, and learning the right techniques will save you time, stress, and money. In this comprehensive guide, we'll delve into the most crucial end of tenancy cleaning skills every tenant should know, tips for achieving professional results, and how to tackle every room in the house.
What is End of Tenancy Cleaning?
End of tenancy cleaning refers to a thorough deep-clean of a rental property before the tenant moves out. The objective is to return the property to the condition it was in at the start of the tenancy, as stipulated in the lease agreement. A meticulous clean not only secures your deposit but also maintains a positive relationship with landlords and letting agents.
Why is End of Tenancy Cleaning So Important?
- Deposit Retention: Most rental contracts require the property to be left clean and tidy, ensuring you don't lose your deposit due to cleaning-related deductions.
- Positive References: Landlords and agents often write references for future rentals--leaving a property spotless can secure a glowing recommendation.
- Legal Obligations: In some cases, failing to clean thoroughly can breach your tenancy agreement, potentially resulting in legal disputes.
Essential End of Tenancy Cleaning Skills
Becoming proficient in end of lease cleaning is not as simple as running a vacuum around the rooms. Let's explore the skills tenants need to master:
1. Time Management and Planning
- Prepare in Advance: Allocate plenty of time before your move. Professionals recommend starting at least one week in advance to avoid last-minute stress.
- Checklists: Utilize an end of tenancy cleaning checklist to make sure no area is overlooked. This includes often-missed areas like skirting boards, door frames, and light fittings.
- Divide and Conquer: Break the cleaning process into rooms and specific tasks, allowing you to manage your time efficiently.
2. Understanding Landlord Expectations
Every landlord's standards for cleanliness will differ. Always refer to your lease agreement and the property's original inventory. Taking "before and after" photos is a wise strategy to avoid disputes. The key goal is to return the space to its original condition. Pay particular attention to high-traffic areas and problem spots.
3. Cleaning Product Knowledge
- All-purpose Cleaners for general surfaces.
- Descalers and Degreasers for kitchens and bathrooms.
- Disinfectants for high-touch items such as switches and handles.
- Glass Cleaners for mirrors and windows.
- Natural Alternatives (e.g., vinegar, baking soda, lemon) as eco-friendly solutions.
Tip: Always read cleaning product labels and test a small area before full application, since different surfaces (e.g., marble, wood, stainless steel) may react differently to cleansers.
4. Attention to Detail
Many deposit disputes arise when small yet critical areas are missed. Think beyond the obvious:
- Baseboards and skirting boards
- Blinds and curtain rails
- Behind appliances
- Inside cupboards, drawers, and wardrobes
- Light fixtures and switches
- Extractor fans, vents, and filters
- Door handles, frames, and hinges
5. Stain Removal Techniques
Learning how to successfully remove stains from carpets, upholstery, or walls is crucial. Common solutions include:
- Carpet stains: Use a mixture of water and vinegar, followed by blotting (never scrubbing).
- Wall marks: Magic erasers work wonders, but always test on a discreet area to avoid damage.
- Oven grime: Baking soda and vinegar paste left overnight can help break down tough residues.
6. Proper Use of Equipment
- Microfiber cloths for dusting and polishing
- Vacuum cleaners with crevice tools
- Mop and bucket (or steam mop for a deeper clean)
- Scrubbing brushes for tiles and grout
- Squeegees for shiny, streak-free windows and mirrors
Room-by-Room End of Tenancy Cleaning Guide
Tackling the property one room at a time is the most effective way to ensure nothing is missed. Here's what to focus on:
Kitchen
- Oven and Hob: Remove racks, trays, and shelves for a soak. Scrub away any burnt-on food. Degrease surfaces and polish glass doors.
- Extractor Fan: Wash or replace filters and clean the hood exterior.
- Refrigerator and Freezer: Defrost, empty, and scrub every shelf and drawer. Remember to clean the door seals and handles.
- Cabinets and Worktops: Wipe inside, outside, and handles. Remove crumbs and marks.
- Sink and Taps: Descale faucets and polish steel. Eliminate any limescale or stubborn stains.
- Dishwasher and Washing Machine: Clean filters and rubber seals, run a hot cycle with vinegar.
- Floors: Sweep, mop, and pay close attention to the corners--often a hotspot for dust and debris.
Bathroom
- Toilet: Scrub bowl, seat, lid, and behind base. Use a disinfectant for all surfaces.
- Shower and Bath: Remove hair and soap scum. Polish glass and tackle any mould or mildew with bleach or a specialised product.
- Sink and Fixtures: Descale and polish all taps and metalwork. Don't forget plugholes.
- Mirrors: Shine with glass cleaner for a streak-free finish.
- Tiles and Grout: Use a scrub brush to remove grime; re-grout if necessary for heavily stained sections.
- Extractor Fan: Dust and check functionality.
Living Room and Bedrooms
- Carpets and Rugs: Vacuum thoroughly, spot treat stains, and consider steam-cleaning if needed.
- Furniture: Dust, polish, and remove any marks.
- Windows: Clean inside glass, frames, and sills.
- Walls and Skirting Boards: Remove marks, cobwebs, and dust.
- Curtains and Blinds: Wash or vacuum; don't ignore curtain rails and tiebacks.
- Switches and Handles: Wipe with disinfectant.
Hallways and Entryways
- Floors: Sweep and mop, especially if high foot traffic has left scuff marks.
- Doors and Frames: Wipe down and polish.
- Lights and Lampshades: Dust or wash as appropriate.
Common Mistakes to Avoid During End of Lease Cleaning
- Overlooking Hidden Areas: Forgetting vents, behind radiators, or above wardrobes is a red flag for landlords during inspection.
- Ignoring Professional Help: Sometimes, professional move-out cleaning is worth the cost, especially for carpet cleaning or oven cleaning.
- Not Documenting Your Work: Take clear, timestamped photos of every cleaned room to provide evidence in case of future deposit claims.
- Leaving Repairs Unaddressed: Patch nail holes, replace blown bulbs, and fix minor damages--cleaning alone doesn't cover these responsibilities.
- Rushing the Process: Cleaning in a hurry leads to mistakes and oversight. Take your time to ensure a thorough job.
End of Tenancy Cleaning Checklist
To make sure nothing is missed, use this handy checklist for your end of rental cleaning:
- Dust and wipe down all surfaces
- Clean cupboards (inside and out)
- Clean and disinfect all bathroom areas
- Polish mirrors, chrome, and fixtures
- Wipe light switches, sockets, and handles
- Dust and remove cobwebs from ceilings, corners, and skirting boards
- Clean kitchen appliances and behind them if they can be moved
- Mop and vacuum all floors, including under furniture
- Wash windows and sills
- Launder curtains, blinds, and removable covers
- Check and address any repairs needed
- Bag and dispose of all rubbish
Professional Solutions vs. DIY End of Tenancy Cleaning
Should you go it alone or hire a professional? The answer depends on:
- Time constraints--if you're short on time, professional cleaning companies can save hours or days of hard work.
- Property size and condition--larger properties or those with stubborn stains may require professional expertise.
- Budget--DIY cleaning costs less, but factor in the value of your time and potential deposit deductions for insufficient cleaning.
If you choose to hire a professional end of tenancy cleaner, always check reviews, get quotes, and clarify what's included. Many landlords will insist on a receipt for proof.
Eco-Friendly End of Lease Cleaning
If you care about the environment, there are sustainable cleaning options:
- Use biodegradable, non-toxic cleaning products
- Opt for reusable cloths, sponges, and brushes
- Minimize water and energy usage
- Recycle packaging and avoid single-use plastics where possible
Green cleaning methods are just as effective when performed correctly, and can be a great selling point should your landlord or new tenants be eco-conscious.

After the Clean: Inspection and Final Steps
- Walkthrough: Conduct a final walkthrough with your checklist and compare with the initial inventory or photos.
- Fix Issues: Immediately address anything you've missed or any areas that could be questioned in an inspection.
- Supply Proof: Provide your landlord or letting agent with copies of photos and, if applicable, cleaning receipts.
- Return Keys and Documents: Only once the property is sparkling clean!
Conclusion: Mastering the Art of End of Tenancy Cleaning
Upholding the standards of a professional end of tenancy clean is an invaluable skill for every tenant. By planning ahead, paying attention to detail, and following a room-by-room approach, you can confidently leave the property in top condition and maximize your chances of deposit return.
If you're unsure or overwhelmed, consider consulting professional cleaners, but remember that with a little elbow grease and patience, you can master the art of end of tenancy cleaning yourself. Not only will you save money, but you'll also become a more responsible and resourceful tenant for all future moves.
Ready to tackle your move-out clean? Download our checklist and start today for a stress-free transition and a spotless reputation!
Latest Posts
Professional Tips for Polishing uPVC Window Frames
The Art of End of Tenancy Cleaning: Skills Every Tenant Needs
Comprehensive Guide to Jewellery Cleaning Methods
Understanding Steam Cleaning for Leather Upholstery
Championing Air Quality for Sustainable and Healthy Interiors